Owing to severe weather conditions, this week’s comic class in Dublin has been cancelled. I’d intended to get everyone inking some blue line art. So instead, I’ll talk about inking here.
There’s a few terms you’ll need to know:
Spotting Blacks – this is the process where-in you decided where to place black ink on the page. Spotting blacks well can make a page pop, steer the readers eyes and make the page finished.
If you’re unsure about where to spot blacks on the page, best thing to do is grab a big fat marker and spot some blacks on a reduced photocopy of the art.
BWS – Black With Stars – a pencilled instruction, indicating to the inker that you want Black – WITH STARS. Stars are often done with white ink on black – and, unless there’s a very specific look you’re after, it’s far easier to leave that to the inker (I’ve seen some pencillers who will ink certain bits of the stars they want because they’re after a specific thing).
X – X marks the spot. To be filled with black ink. and X in a bit of open pencils usually indicates the penciller wants that area to be filled with ink.
Dead line – no, not that one. A dead line in inking is a line that’s got not variety of thickness. Dead lines tend to look lifeless and flat (hence ‘dead’) and are to be avoided on anything really.
Tools:
Nib Pens – There’s a whole bunch of nibs worth picking up, and an inkers arsenal will often have a variety of sizes and “bounce”. Nibs can be stiff, or soft, and this will fall down to your preference. The most common nibs are:
Kuratake G Nib – A stiff nib for general line inking.
Hunt 102 – A fine lined, stiff nib – good for detail.
Hunt 107 – a fine lined, soft nib – good for detail. Pick one based on your preference.
A good inker can ink with pretty much anything, and each tool will do something different, but these are a fine set of nibs to start from. Here’s a decent set (ask for it for xmas! http://amzn.to/2ykKOXz )
A new nib will need cleaned (it’s covered in a protective film) either wash it with warm soapy water and dry thoroughly, or burn it off with a lighter (just a quick swipe with the flame should do it).
If you don’t, it’ll likely work fine, but it may take a little while to settle down.
You’ll also need to buy a pen holder.
Brushes – best advice on brush inking is to buy a variety of tools and try them all. Some people will be comfortable with a thicker brush and some with a thinner. The brush offers the best of all inking tools, but can be a devil to get right.
It can make even the dullest straight line look organic and attractive.
Here’s a video I made on using a ruler with a brush or a nib to rule a straight line (it’s a surprisingly uncommon bit of knowledge)
https://www.youtube.com/watch?v=WftBA4BbaSM
Brush use:
The brush has a number of component parts: The tip, the body, the ferrule (the metal bit joining the brush to the handle) and the handle.
When inking, avoid getting ink near the ferrule – anything there can dry and harden and ruin the brush (never through away a ruined brush as you can still use it to get some interesting textures)
Wash the brush frequently in clean water. I dry it by twisting the whole brush as I draw it down over some tissue (kitchen roll is best)
This is one of my favourite brushes (amazon has it a bit pricey, you can buy these cheaper locally, I’m sure) http://amzn.to/2ylB1jV
But more brush artists prefer a larger brush like this Winsor and Netown Sable Brush http://amzn.to/2ynvGpL
Nibs and brushes though often considered the best option, aren’t the only thing, there’s a lot of great pens available – where you can you want to stick to something water and light resistent, I’ve used some of these in the past:
Zebra Brush Pen – one of my favourite inking tools, flexible, always ready, waterproof and apparently lightfast. I’ve used the Medium pen here, and I’ve just ordered a set of various sizes and excited to play with them. http://amzn.to/2ypEqvL
Micron Pigma Pens – these come in a variety of sizes, which is just as well, as unlike brushes (or brush pens) these can only give you a sort of dead-line though you can get a fair amount of variety if you repeatedly go over a line with a pen and introduce different thickness.
Pretty great for drawing background details though where the dead line isn’t always a drawback.
Just be careful to get original micron pens, as there’s a bunch of counterfeit options out there that aren’t as lightfast nor as good. Here’s a full set to play with http://amzn.to/2ypln4B
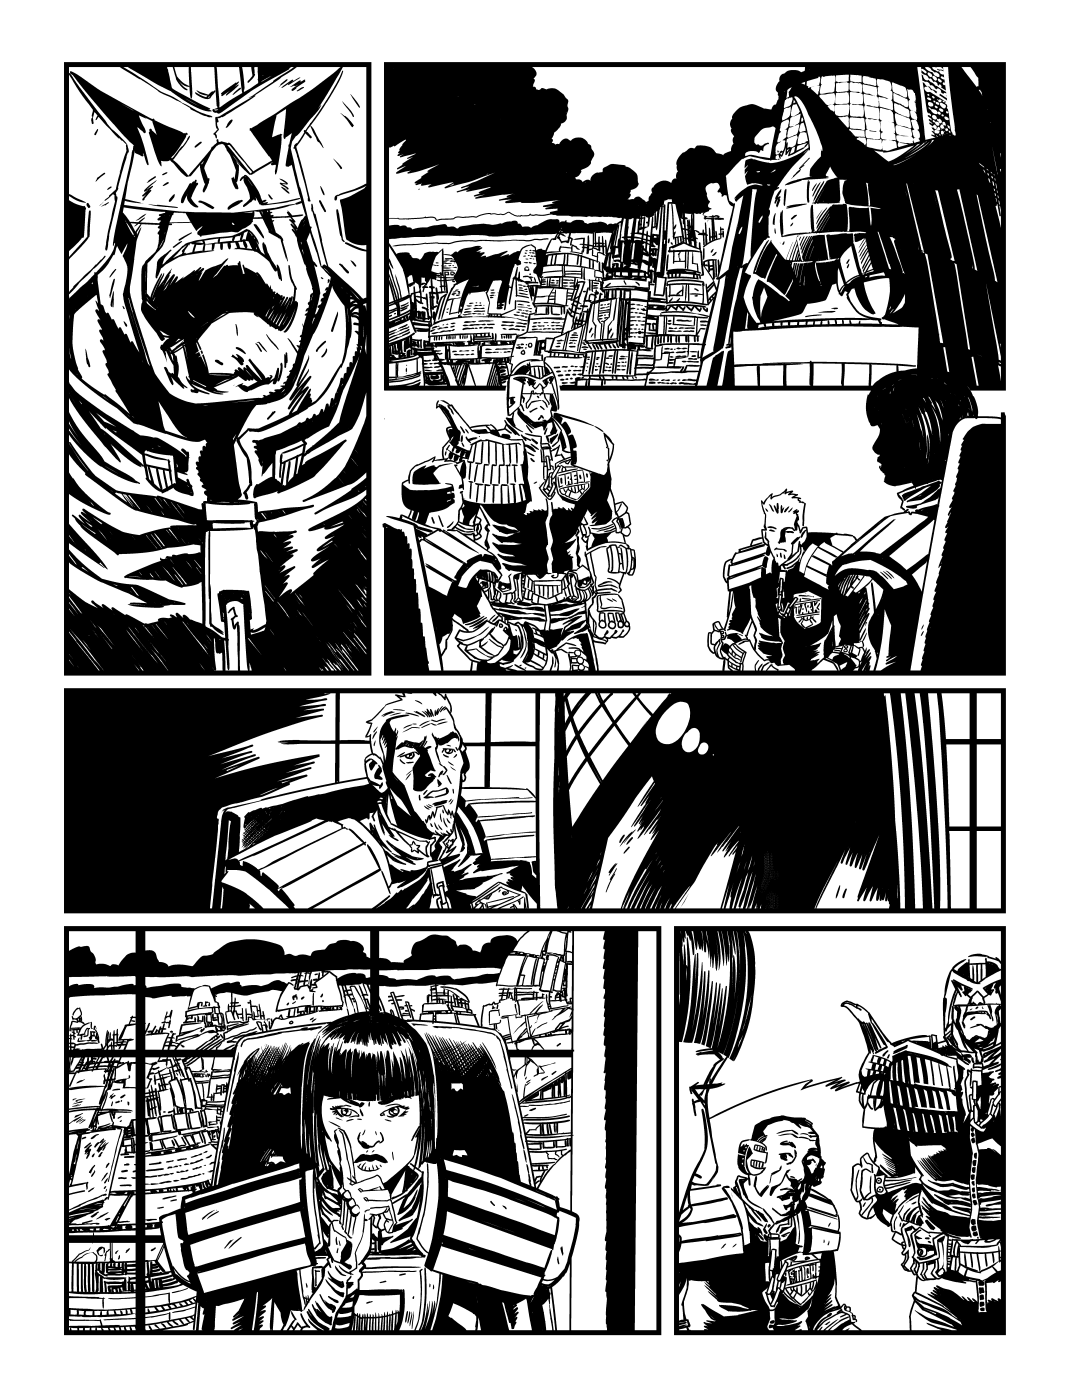
Here’s a few files to play with (from mine and Rob William’s story “Nurture” published by 2000AD.) I’ve given you what the pencils and inks look like as well as blue line versions of the pencils and blue line versions of the inks. If you’re feeling brave, print the pencil bluelines and ink that. If that’s a little daunting (and it is because my pencils are pretty sloppy) then print the blue lined inks and try inking from those. Let me know how you get on!