

So, mulling over yesterday’s post I figured I should give something useful, basically, I’m gonna post things I’ve learnt or found useful (or frustrating)
First thing to keep in mind about Blender is there are two distinct modes when you’re building 3d stuff (there’s actually more, but for simplicity’s sake we’ll deal with these two) they are:
Layout and Editing.
Now, Blender has a super customisable UI and we can get into that at some point, maybe, but for a basic barebones install it has a bunch of tabs for different “Workspaces” which allow you to do all sorts of things, we’re gonna focus on Layout and Modelling (where editing takes place)

Layout mode is where you can add objects (usually pretty simple primitive shapes, which you can add from a drop down menu – things like cubes, spheres, cylinders etc) and Editing mode is where the power really kicks in and you can do all kinds of groovy things to those basic shapes.
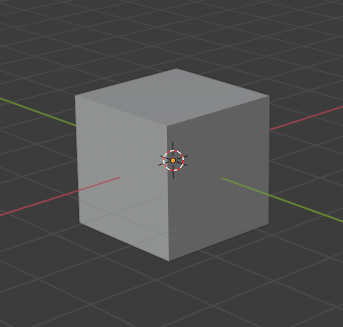
Blender starts with what it calls the “Default Cube” it’s sized at 2 Blender Units x 2 Blender Units – now I think of those units as Meters since it’s the most useful unit of measurement to work with, and I’ll frequently get 3d models (thank you sketchfab) and have to scale them to the correct size so all my models are in scale with each other. Throughout I’ll refer to things as 2m to mean 2meters (or 3m, 4m, etc)
You can add other shapes from the Add menu if you like.
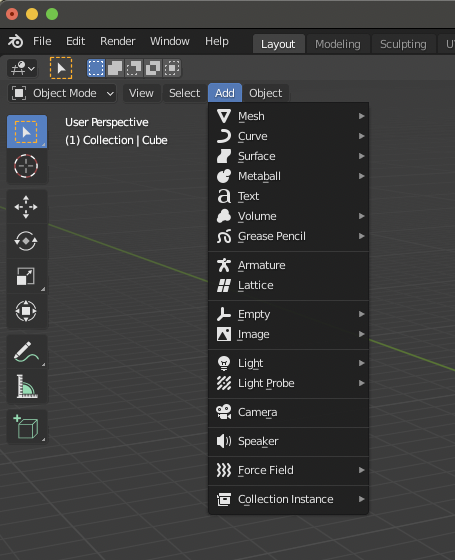
And they all become new – entirely separate – objects in your scene (they’ll plant themselves on top of your default cube, mind you, so you’ll want to move them around)
Because it’s a 3d program, obviously, it uses 3 axis to work in, the Z axis is up and down, X is left to right and Y is front to back.

Though since blender is often used for animation it also uses a fourth axis – time, along the bottom of the screen is a frame count for animation, we’re not gonna use it, but it’s handy to know, if you hit the space bar it will start playing the animation (and you’ll see the counter head move across the time bar) nothing will happen since you haven’t DONE any animation but it will confuse and frighten you (well, it did me)

(so if you see that blue number change rapidly, you’ve probably hit the space bar)
As much as possible blender lets you do all sorts of non-destructive things to these 3d objects, scaling, rotation, movement, etc. Every object has a point of origin which doesn’t change until you change it.
So, scaling the default cube (say to make it twice as big) means you’ve got a cube that’s 2m x 2m but has been scaled 2×2 – this means that in order to FIX the size at 4m x 4m you need to apply it (it’s usually not a problem unless you scale it so it’s no longer square shaped in which case you can get odd results, so it’s good to know…)
When an object is selected it outlines in orange, and press S you get this double headed arrow allowing you to scale
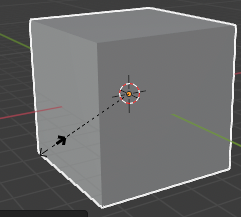
You can scale simply by moving the mouse in or out (and if you move the mouse so it’s off screen it will continue to scale like the mouse movement is wrapping off one edge of the screen on to the other edge – makes sense when you see it, sounds like gibberish as I describe it)
While you’re scaling you can lock the scale in to any of the Axis by pressing X, Y or Z depending on which axis you want to scale. If you want to scale the XY axis only and NOT the Z axis you press SHIFT Z – (or SHIFT X does YZ, SHIFT Y does XZ
Scaling is only finished when you press the ENTER key (so if you’ve hit X to scale along the X and realised you meant Y you can press Y and the scaling will jump to the Y axis)
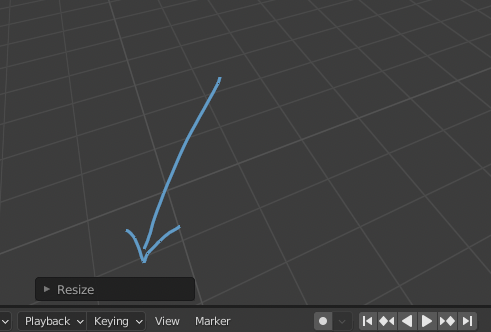
If you want to do precision sizing you can use the Tool Settings Panel, which is available immediately after you use the tool – hidden in the bottom left of the screen will be something like this (the blue arrow is me drawing to help you)
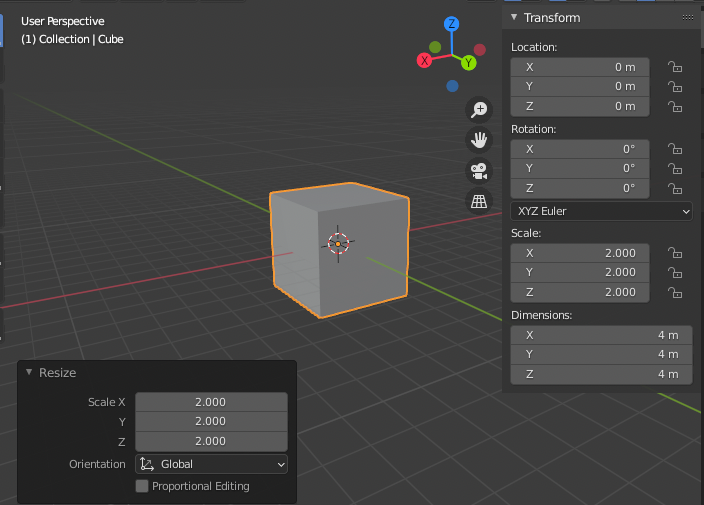
Clicking the little arrow head will expand this to show you this:
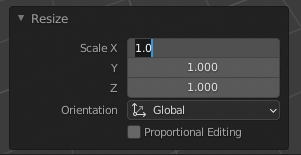
And from there you can precisely enter your resizing (remember this is a scale factor so if you’re cube is 2m across and you scale X by 2 it’ll become 2×2 = 4M across MATHS IS HARD)
But now, of course the object is the same original size but has been scaled
Pressing N on the keyboard will pop out a little sidebar which will tell you all sorts of useful things about your object and looking at our scaled cube it looks like this:
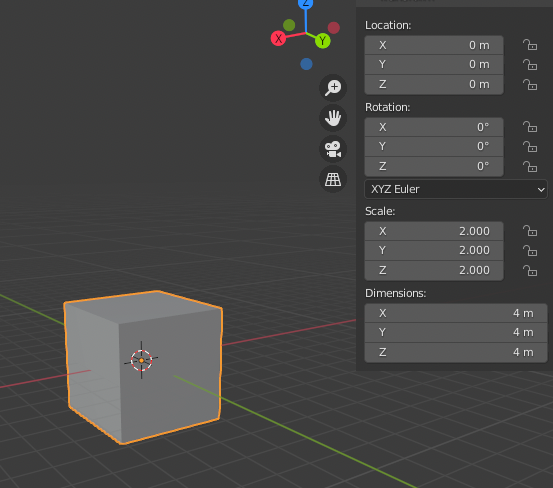
We can actually rotate, scale, and resize the object from this info panel too (or just lock all of those things)
Once an object has been resized it’s a good idea to APPLY that resize – so it is no longer scaled (or rather so the scale becomes 1) this is particularly important if you’re working on something you’ve made taller than it is wide (settle down Freud) where the scale might be x: 5, y: 50, z: 5. You really want to deal with things that have a 1 across their entire scale, it makes things like adding interior details so much easier.
Here for example is what can happen :

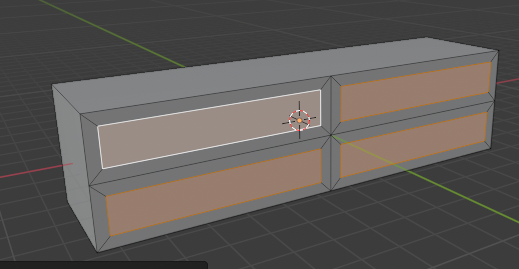
The first box has been stretched and I’ve subdivided it and inset a new face (don’t worry these terms will come) important to note the first box hasn’t had its scaling applied, so you can see it’s given wider sides than tops. The second box I applied the scaling and subdivided and inset a new face and you can see the inset faces here are much more regular, nice exact distances from each other (and the tops and sides) so if you’re making, I dunno, a bookshelf, this is pretty important to get right.
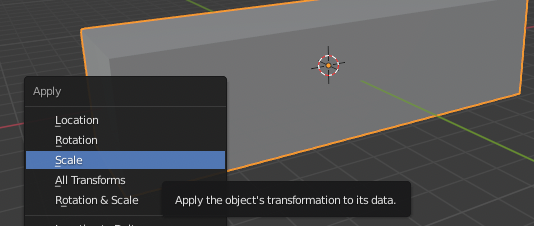
To apply scaling you press CMD A and apply the scale on the popup menu (you can also apply other transformations you’ve done if you like – blender being blender you can press CMD A then S without having to deal with the popup)
Blender is super complex, and it’s got shortcuts for everything. If you press TAB from layout you’ll find yourself in edit mode without going into the MODEL workspace, but it’s ok, TAB will take you out again. (And again if you hit that SPACEBAR you’ll find yourself playing an animation that you haven’t made, press SPACEBAR and calm down Paul, jesus)
Anyway, I’ll keep blogging on this subject while I can, hopefully we’ll end up with a reasonably sensible small set of tools useful to comic artists. For me, it boils down to : importing models to edit, scale, adjust. Then exporting them to clip studio and … well, that’s largely it. But you know, Blender being Blender (and me being overly verbose) this might take a while.
Let me know in the comments what you think, if this is too basic, too hard, useful/not useful.
-pj
Thank you Paul.
I have been using Maya for over 20 years and I’m testing the field about Blender (which I only came across) about a week ago.
I need to upgrade most of my hardware so this is going to be an expensive and lengthy process.
Your link was given to me by Annie Parkhouse – an old friend.