This is a Clip Studio Tutorial, so if it’s not your thing, that’s cool!
I’ve pretty heavily customised my version of Clip Studio. By small degrees over time, I’ve built up a whole bunch of time saving things that are now part of my muscle memory and god help me if I have to use someone else’s clip studio because then I’d be mush.
Clip Studio lets you set up short cut keys for almost everything, from the tools you might use (you’ll no doubt be familiar with P for Pen/Pencil) to the Menu Items (CMD S for Save) but you can also add keyboard shortcuts to auto actions – auto actions, if you’re not familiar allow you to save a series of steps to replay them later. You could – for example, set up some auto actions that create a new greyscale layer, label it “pencils” and set the layer to Draft mode – and then assign a keypress – say ALT CMD P to it, which means if you need a new pencil layer – boom! ALT CMD P!
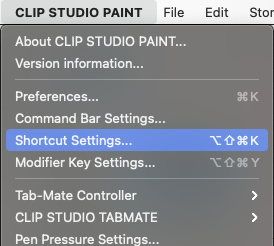
Oh, in order to create a short cut you simply go to Clip Studio Paint -> Shortcut Settings…
From there you can select from the drop down which toolsets you want to alter the shortcuts for
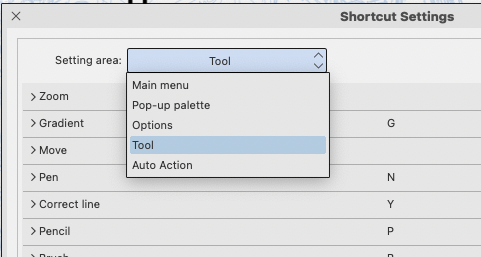
And then just assign your shortcuts, clip studio will tell you if they’re already in use, and you can choose to delete that or keep it.
Here’s some of the short cuts I’ve set up that you might want to consider which vary a little from the clip studio standard…
| Key | Mapped to… |
| A | I’ve set this to my Airbrush tool, by default clip studio uses B to cycle through each of the brush types including air brush, but this is a common one for me. |
| B | Brush tool, kept clip studios default. |
| C | Switch between Colour / Transparent. |
| D | Draw a Line – the D key gives me nice simple straight lines – this is one I added. |
| E | Eraser – I actually could change this to Ellipse as I don’t use the eraser that much – I’ll use the wacom pen or for precision, I’ll switch the colour to transparent. |
| F | FILL! Of course this is fill, for reasons known only to themselves, Clip Studio defaults fill and gradient to the same key – G – but anyone who’s used photoshop knows F is for Fill. |
| G | Gradient. Duh. |
| H | HIDE – Special magical key that calls autoaction for me – the autoaction basically hides a folder labelled “pencils” so in effect pressing H hides my pencils. How I pull this magical feat off is a treat for another post! |
| I | Inkdrop – pretty standard |
| J | J is Blend – Clip studio’s default, and – I confess- something I never use. Maybe I should reassign it to something useful… hmmm… |
| K | K is the tool to move the layer – very useful (but a poor mnemonic – what does it stand for? WHY K? WHY?) |
| L | Lasso – standard. |
| M | Rectangle Select – ie MARQUEE! |
| N | Ah, a clever one – N is for Nib (or peN) – clip studio by default uses P for both Pen and Pencil – but I like to know which bloody tool I’m using, so I changed it for N |
| O | Is Object – the object manipulation tool. I kind wish it was for Circles now. |
| P | Pencil (see prev) |
| Q | Q is for Quick Mask – Clip Studio doesn’t use a key for this tool, so I mapped it (it’s the same key in photoshop) |
| R | Rotate – lets you rotate the page. |
| S | SHOW – this is the H – HIDE opposite, this shows my pencil folder |
| T | Text Tool – largely only use this when lettering |
| U | “Direct Draw Tool” lines and ellipeses and rectangles. Clip Studio’s willfully obscure default. (“D” makes more sense and maybe I’ll map all those tools to D and then you can press D to cycle through each) |
| V | I use this to add VANISHING LINES! Perspective lines, it’s clever because V for Vanishing Lines and it also looks like some lines drawn in perspective. |
| X | Swap Between the two main colours – this is more like a visual aid than a mnemonic I suppose. |
| Y | Remove Dust – I rarely use this tool (it’s great for ..er.. removing dust and dirt from scans you’ve done) and it certainly doesn’t need a special key on its own – so that’s a handy one to think about what I can remap it to (I want a circle key!) |
| Z | Ah, I made special line tool that only draws in 45 degree angles, so straight up/down side to side or diagonal, and Z looks like what the tool does. Personally, I think this might be the single smartest thing I’ve ever done. |
And finally, I’ve also set the entire row of numbers on the keyboard – 1 through to 9 to be various pencils/pentools/airbrushes that I prefer. 2 – for example – is my default G nib set to 0.8 – 7 is my thumb print airbrush texture tool.
Anyway, open up your clipstudio and customise away, maybe what I’ve done will be useful to you or maybe you’ll think of something clever to add.
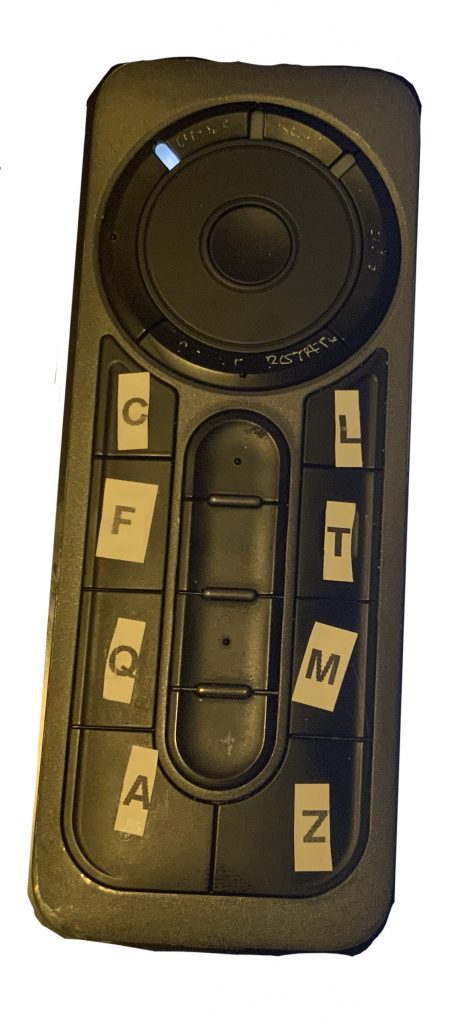
And one final parting shot – I’ve a cintiq EK Remote that is a sort of adjunct to the keyboard, it has a number of buttons on it and I’ve found remapping those buttons to the tools I most commonly use above and then – the smart bit – labelling what letters the tools are using a label maker, instantly made the functionality 100% better.